
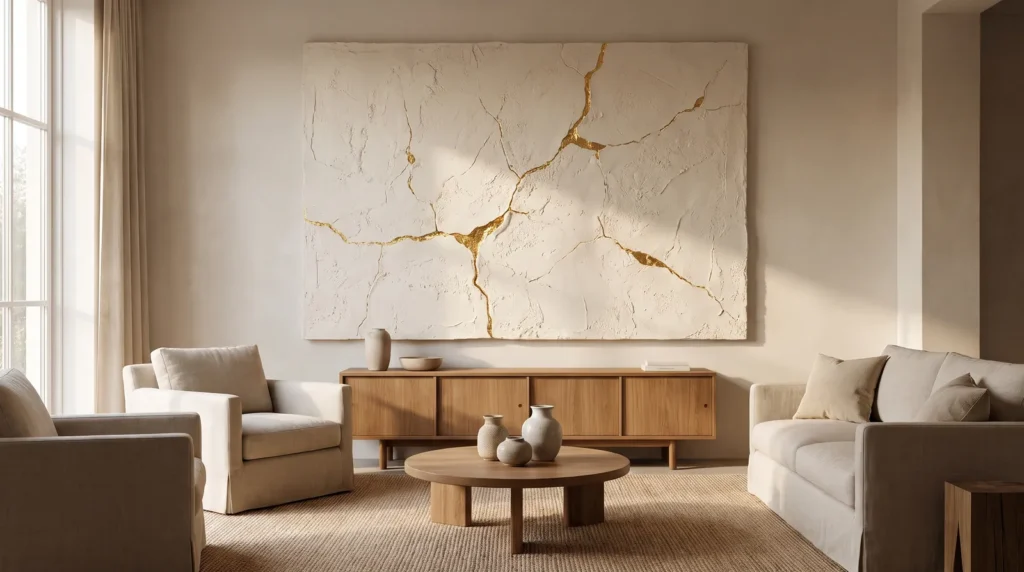
Plaster art with gold leaf can look beautiful: soft, chalky texture with thin seams of metal catching the light. When it goes wrong, though, it usually goes wrong in the same few ways, from tarnished green leaf to flaking edges and a glossy, plastic-looking finish.
This guide follows the process step by step, from preparing the canvas to sealing the gold, and points out the 18 mistakes that trip people up most often, so your piece stays bright and refined for years.
Quick Summary
- Skip hardware store joint compound. It cracks on flexible canvas; acrylic modeling paste works much better.
- Get the timing right. Gold leaf size (the adhesive) needs to dry to a clear, tacky stage before you lay the leaf.
- Seal it properly. Imitation gold leaf contains copper and can turn green unless it’s sealed with a solvent-based varnish.
Step One: Prepping Your Canvas Base
Good gold-leaf art starts with a solid base, because the canvas underneath decides whether the piece survives drying.
1. Using a Flimsy Canvas
Cheap canvases sag in the middle under wet plaster. Choose a gallery-wrapped canvas with a thick wooden frame.
2. Skipping the Corner Keys
The tiny wooden wedges in the bag with your canvas are canvas keys. Tap them into the slots in the back corners of the frame; they push the frame outward and tighten the fabric, which helps prevent cracks.
3. Ignoring the Gesso Primer
Raw canvas absorbs moisture unevenly, so wet paste applied directly to it dries too fast and can flake off. Brush on a thick coat of acrylic gesso first and let it dry completely.
4. Choosing the Wrong Backing for Massive Art
For anything larger than 36 by 48 inches, skip canvas and use a rigid MDF or birch plywood board. Wood doesn’t flex, so it’s a much steadier base for heavy texture.

Step Two: Sculpting the Plaster Texture
This is the fun part. How you apply the medium decides whether the finished piece looks polished or rushed.
5. Buying Basic Drywall Joint Compound
Cheap joint compound is everywhere online, but it’s made for rigid drywall. On a flexible canvas it dries brittle and cracks. A flexible modeling paste, such as Liquitex Flexible Modeling Paste, moves with the fabric instead.
6. Applying the Paste Too Thickly
Piling on thick paste is satisfying, but it causes problems. Thick layers trap moisture underneath, so the top dries, shrinks and cracks. Keep each layer under a quarter of an inch.
7. Overworking the Design
Organic texture looks best when it’s a little imperfect. Going over the same spot again and again makes it muddy and flat, so make one confident sweep and then leave it alone.
8. Using the Wrong Tools
A flimsy plastic knife won’t give you clean arches. Use metal palette knives for sharp ridges and a notched tile trowel for evenly spaced parallel lines.
9. Forgetting Negative Space
Covering every inch in texture can overwhelm the eye. Leave some smooth, flat areas so the textured sections have room to stand out.

Step Three: Waiting Out the Cure
This stage is all about patience, because rushing the drying is what causes most problems.
10. Confusing Dry with Cured
Plaster can feel dry after a couple of hours while the inside is still damp. Wait at least 24 to 48 hours before adding any paint or adhesive.
11. Force-Drying with Heat
Keep hair dryers and heat guns away from wet art. Fast drying shrinks the surface quickly and can leave it covered in fine cracks. Let it air dry in a cool, well-ventilated room.
Step Four: Applying the Gold Leaf Adhesives
Gold leaf turns textured canvas art into a real statement piece, but it’s delicate and easily blown about, so a little care goes a long way.
12. Using Standard Craft Glue
PVA glue dries too quickly and forms a hard shell, so it isn’t right for gilding. Use a product made for the job, called metal leaf size. It stays tacky for a long time, giving you plenty of time to lay the gold.
13. Applying Gold While the Sizing is Milky
Sizing looks milky white when you first brush it on, and gold applied at this stage will slide off. Wait 15 to 30 minutes until the size turns completely clear and feels like the sticky strip of a sticky note. That’s the right amount of tack.
14. Handling the Leaf with Bare Hands
Imitation gold leaf is very thin, and the oils on your fingers can tarnish it almost straight away. Keep the leaf on its tissue backing as you press it on, and use tweezers for loose flakes.
15. Ignoring the Shadows
Gold across the whole canvas can look flat. The magic is in the contrast, so apply the size only to the high ridges or the deep grooves and let the shadows do the rest.

Step Five: Sealing the Gold
Once the gilding is done, it’s tempting to stop. But unsealed imitation gold can slowly darken or turn green over the next few months, so these last steps matter.
16. Skipping the Burnishing Process
Before sealing, burnish the gold. Sweep a soft, dry mop brush gently over the gilded areas to brush away loose flakes and press the rest firmly into the texture.
17. Leaving Excess Flakes Behind
Loose flakes of gold can get trapped in the varnish, so dust the whole canvas thoroughly with a clean, dry fan brush first.
18. Sealing with Water-Based Varnish
This is the mistake that costs the most. Most imitation gold leaf is largely copper, and water-based varnishes don’t protect it well from the air, so it can tarnish and turn green. Use a solvent-based archival varnish, such as Golden MSA Varnish, to keep the metal bright for many years.

Common Questions
Can I mix acrylic paint directly into the modeling paste?
Yes. Mixing heavy body acrylic paint into the paste tints the texture all the way through, so if it ever chips, the color underneath still matches.
How do I clean gold leaf sizing out of my brushes?
Wash your brush straight away with warm water and grease-cutting dish soap. If the size has already started to turn tacky, odorless mineral spirits will dissolve it.
Why is my gold leaf looking dull instead of shiny?
Gold usually looks dull when the size went on too thick or the leaf wasn’t burnished. Brush the size on in a very thin, even layer, and after laying the leaf, rub it gently with a soft cloth to bring up the shine.
Final Thoughts
Gold leaf on plaster looks best when the basics are right: a firm base, thin layers, patient drying, clear sizing and a good seal. Avoid these 18 mistakes and your piece will stay bright and refined for years.

