
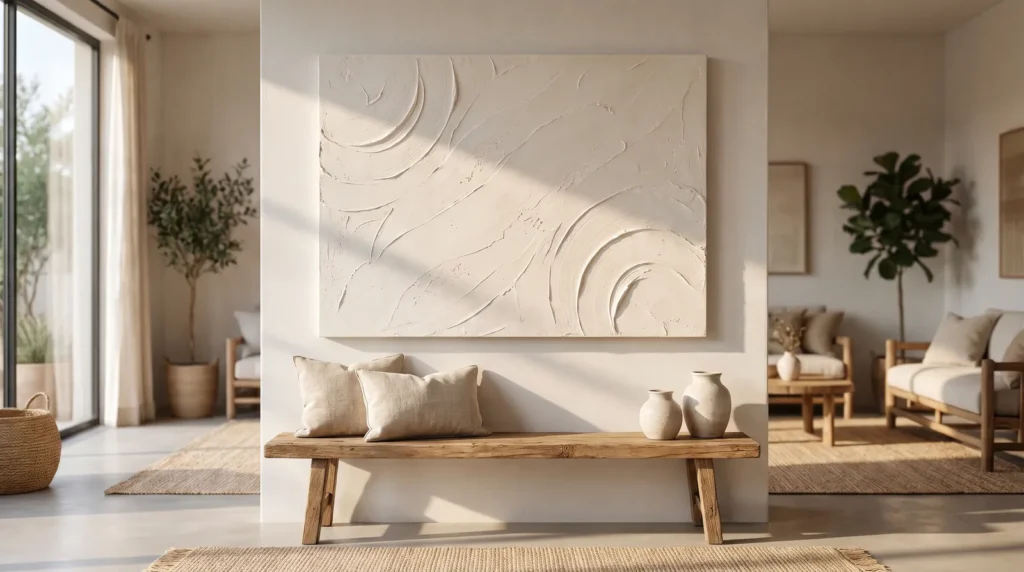
In short videos, a DIY plaster art canvas looks easy: spread some mud, drag a tool through it, done. In real life, a heavy rigid material on a flexible fabric is a tricky combination, and small mistakes in preparation show up later as cracks, flaking and sagging.
This guide answers the questions people ask most, from canvas prep and materials to cracking, cheap-looking texture, sealing and hanging, and covers 25 common mistakes with a simple fix for each.
At a Glance
- Prime before you plaster. Raw canvas pulls moisture out of joint compound and causes cracks, so seal it with acrylic gesso first.
- Support the center. Canvas sags under wet plaster, so brace the back with cardboard or foam board while you work.
- Mix color in rather than painting over. Tinting wet plaster with heavy body acrylics gives a rich, matte, stone-like finish that looks far more expensive than painted texture.
- Seal the finished piece. Unsealed plaster collects dust and can slowly crumble. A matte spray varnish protects it without spoiling the natural look.
What Are The Biggest Canvas Prep Mistakes?
The foundation decides how the finished piece turns out, and skipping the prep is the most common reason plaster art falls apart later.
1. Skipping the gesso primer
Raw canvas soaks up water fast, so wet plaster applied straight onto it dries too quickly and is likely to crack. Paint a thick coat of acrylic gesso over the canvas first to create a barrier.
2. Ignoring the canvas keys
Check the plastic wrapper your canvas came in for small wooden wedges. These are canvas keys, and tapping them into the inside corners of the frame pulls the fabric tight. Loose fabric is one of the main causes of cracked plaster.
3. Using a flimsy student-grade frame
A cheap, shallow canvas about half an inch deep can warp under wet plaster. Choose a gallery-wrapped canvas at least 1.5 inches deep; the thicker frame is much better at holding the weight.
4. Not supporting the back during application
When you press a metal trowel into the middle of a large canvas, the fabric dips and the plaster pools there. Slide a piece of stiff cardboard or a stack of books under the fabric while you work so you have a firm, flat surface to press against.
5. Forgetting to tape the edges
Neat edges make a piece look deliberate, while plaster dripping down the sides looks rushed. Wrap the outer edges of the frame with painter’s tape before you start, then peel it off while the plaster is still slightly wet for a crisp, clean edge.

Which Plaster Materials Actually Work?
The hardware store aisle is full of different tubs, and picking the wrong one is the quickest way to spoil your DIY textured canvas art.
6. Buying Plaster of Paris
Leave Plaster of Paris on the shelf for this project. It dries very hard and brittle, so if the canvas flexes or gets bumped, it can crack like glass.
7. Confusing spackle with joint compound
Spackle is designed to be lightweight and is full of tiny air pockets. That helps it dry quickly and resist cracking in small wall holes, but it can’t hold deep sculptural ridges; it simply collapses.
8. Using the wrong joint compound
For the best budget option, look for an all-purpose joint compound such as USG Sheetrock All-Purpose (the tub with the green lid) rather than the lightweight blue-lid version. All-purpose compound contains more binder, so it sticks better to primed canvas and holds sharper peaks.
9. Skimping on modeling paste
If your budget allows, use an artist’s flexible modeling paste such as Liquitex Flexible Modeling Paste. It’s made from marble dust and acrylic, so it bends with the canvas and is far less likely to crack. It costs more, but it’s the most reliable choice.
10. Mixing water into the compound
Some tutorials suggest thinning plaster with water, but water weakens the binder in the compound. If the mud is too stiff, stir in a few tablespoons of matte acrylic gel medium instead, which loosens it and adds flexibility at the same time.
How Do I Prevent The Plaster From Cracking?
Once the canvas is prepped and you have the right mud, the next step is applying it well.

11. Applying one massive, thick layer
Piling three inches of wet mud onto a canvas usually ends in cracks. The top dries while the bottom is still wet, and the strain pulls the plaster apart. Build texture in thin layers and let each one dry completely before adding the next.
12. Force-drying with a hair dryer
Heat from a hair dryer or heat gun drives the moisture out too fast, so the surface shrinks and cracks. Let your art air-dry in a room with moderate temperature and low humidity.
13. Moving the canvas before it cures
Resist the urge to pick the canvas up to admire it or move it to another table. Leave it flat for at least 48 hours, because moving a wet canvas flexes the fabric and weakens the plaster while it sets.
14. Not creating a “butter” coat
Before you add arches or thick peaks, spread a very thin, flat layer of plaster over the whole gessoed canvas with a wide putty knife, a bit like buttering toast. It gives the thicker layers something to grip.
15. Skipping the flexible medium
If you’re building very deep 3D texture, joint compound on its own may not hold up. Mix a good dollop of PVA glue or acrylic gloss medium into the mud to give the dried plaster a little flexibility.
Why Does My Texture Look Cheap?
You want texture that looks like art, not an unfinished drywall patch, and technique makes all the difference.

16. Using tiny, timid strokes
Confident marks look best. Lots of tiny dabs with a small palette knife can look busy and cheap, so try a large 10-inch drywall knife and make long, deliberate sweeps across the canvas.
17. Overworking the compound
Try to leave it alone. The more you scrape and smooth one section, the flatter and muddier it gets. The nicest organic textures usually come from one or two confident passes; if you really don’t like an area, scrape it off and start again.
18. Painting over the plaster instead of mixing it
Color makes a big difference when you’re learning how to make plaster art on canvas. Paint brushed over dried plaster seals the surface and can look a little shiny. Instead, mix a squirt of heavy body acrylic paint into the wet mud; the color becomes part of the material and dries to a lovely chalky, stone-like matte.
19. Using the wrong tools
Flimsy plastic knives make it hard to shape heavy mud. A metal notched trowel gives even, Japandi-style ridges, and a metal cake scraper is great for wide, flat sweeps.
20. Lacking a cohesive composition
Abstract doesn’t have to mean random. Before you start, sketch a simple plan and decide whether you want a central focal point, a sweeping off-center arch or a repeating grid. A bit of balance makes the piece look intentional.
How Should I Seal And Hang Heavy Art?
Once your piece is dry, the last steps are protecting it and hanging it safely.

21. Leaving the surface unsealed
Raw joint compound is porous, so it soaks up oils from your fingers and traps dust. Sealing it is worth the extra step.
22. Using a glossy varnish
A cheap high-gloss spray can spoil a chalky wabi-sabi texture. Use a good matte spray varnish instead, holding the can about twelve inches away and applying three very light, even coats. The art is protected but still looks like raw stone.
23. Hanging with command strips
Plaster is heavy: a 36×48 inch canvas covered in joint compound can weigh over twenty pounds. Adhesive strips won’t hold that, and the piece could fall and break.
24. Ignoring the D-rings
Rather than hanging the frame’s wooden edge on a single nail, screw two heavy-duty metal D-rings into the back of the frame and string picture wire tightly between them. Hang the wire on a strong hook screwed into a stud or a heavy-duty anchor.
25. Rushing the final cure time
Dry to the touch isn’t the same as fully dry. Joint compound can feel hard on the outside while the inside stays damp for days, so wait a full week before hanging a large piece.
Quick Answers
Can you use normal wall filler for canvas art?
You can, but it isn’t ideal for deep texture. Standard wall filler (spackle) is full of air so it dries quickly in small repairs, and it doesn’t have the density to hold sharp ridges on a canvas. Joint compound or acrylic modeling paste gives much better results.
How long does plaster canvas art take to dry?
The surface usually dries in 24 to 48 hours, depending on how thick the texture is and how humid the room is, but it can take up to a week to dry all the way through. Keep the canvas flat the whole time to prevent sagging and cracking.
Does joint compound crack on canvas?
It often does if it goes straight onto raw, unprimed canvas, because the fabric soaks up moisture quickly and flexes under the weight. Prime the canvas with gesso, brace the back and mix a flexible acrylic medium into the compound to prevent it.

