
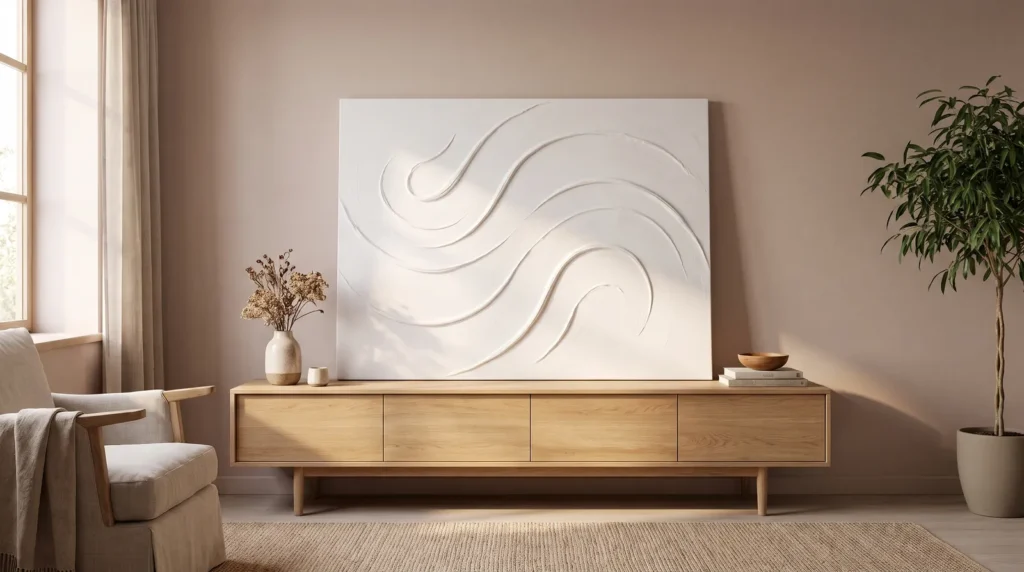
Modeling paste art techniques are what separate a textured canvas that lasts from one that cracks within a week. Acrylic modeling paste is flexible, holds crisp peaks and dries hard, but only if you choose the right paste, support the canvas and build the texture at the right thickness.
You don’t need a fine art degree to get it right. These 18 rules walk you through choosing paste and canvas, tools and thickness, designer-style patterns, and drying and sealing, so your minimalist textured art stays crack-free.
Key Takeaways
- Use a flexible acrylic modeling paste on stretched canvas to avoid spiderweb cracks.
- Skip the heat gun and let textured art dry naturally at room temperature.
- Support the back of your canvas with cardboard while applying heavy pressure with your palette knife.
- Mix acrylic paint into your paste sparingly, or paint over the dried texture for the most vibrant color payoff.
The Foundation Rules: Choosing the Right Paste and Canvas
Good DIY textured canvas wall art starts before you pick up a tool, because the materials you choose decide how well it lasts.
1. Skip the hardware store spackle
Spackle and joint compound are made for rigid drywall and don’t contain flexible binders. A stretched canvas flexes slightly as the humidity in your home changes, so rigid spackle on top of it tends to crack and flake.
2. Use flexible modeling paste for canvas
Choose a medium made for art. Golden or Liquitex flexible modeling paste are both reliable choices. They’re made from marble dust in an acrylic binder, so they dry hard, opaque and matte but can still flex with the canvas.
3. Support the canvas back during application
A stretched canvas has a lot of bounce, and when you press down with a metal tool, it stretches and dips. Slide a piece of stiff cardboard or a large book underneath the fabric, resting on the table inside the stretcher bars, so you have a firm surface to press against.

4. Prime raw canvas with gesso first
If your canvas is unprimed, seal it first. Raw cotton or linen pulls water out of modeling paste too quickly, which weakens the bond. Brush on a thin layer of acrylic gesso and let it dry completely before adding texture.
The Application Rules: Tools and Thickness
How you handle the paste makes the difference between a designer-looking piece and a messy one.
5. Ditch the kitchen butter knife
A butter knife is too thick and stiff for elegant swoops. Metal palette knives are worth buying: the thin blade flexes slightly under pressure, so you can drag the paste smoothly without catching or tearing the texture.
6. Layer thin instead of thick
Thick texture looks gorgeous, but two inches of paste applied in one go usually causes trouble. The top forms a skin while moisture is trapped underneath, and as it dries, the paste shrinks and cracks. Build texture in thin layers of about a quarter inch instead.
7. The 45-degree palette knife angle
Hold your palette knife at about 45 degrees to the canvas, load a generous amount of paste onto the bottom of the blade, press down firmly and pull. At that angle the paste spreads smooth and even; holding the knife too upright just scrapes it back off.
8. Use a notched trowel for architectural lines
For the popular Japandi ribbed arch, use a notched adhesive trowel from the flooring aisle. Spread a flat, even layer of paste first, then drag the trowel through it in one slow, continuous motion with your wrist held steady.
9. Mist the paste to extend workability
Modeling paste starts drying as soon as it’s exposed to air, so on a large 36 by 48 inch canvas the edges can dry before you’ve finished the middle. Keep a fine-mist spray bottle nearby and mist the canvas lightly to keep the paste workable.
The Texture Rules: Patterns to Try
These modeling paste art techniques are where the piece really comes together.

10. The heavy impasto swoop
Impasto means paint or paste laid on so thickly that every stroke shows. Load a large, rounded palette knife, press the tip down and twist your wrist as you pull downward. It leaves an organic, petal-like shape that catches the light beautifully.
11. Sgraffito carving for wabi-sabi depth
Sgraffito means scratching into the surface. Spread a smooth, thick layer of paste, and while it’s still wet, carve grooves with a silicone clay tool, a wooden skewer or a wide-tooth comb. Where the bare canvas shows through, you get striking areas of negative space.
12. Stenciling for raised geometric relief
Tape a thick plastic stencil firmly to the canvas and spread modeling paste over it with a flat putty knife, as if you were icing a cake. Scrape off the excess so it’s level with the stencil, then peel the stencil away straight away while the paste is wet to reveal crisp, raised shapes.
13. Embedding mixed media carefully
You can press jute string, small beads or dried flowers into wet modeling paste, and the acrylic binder holds them like strong glue. Push each item in far enough that its edges are fully covered.

14. The dry brush highlighting method
Texture shows up through shadow. Once the paste is completely dry, dip a dry bristle brush into a tiny amount of dark beige or taupe acrylic, wipe most of it off on a paper towel and brush it lightly over the raised peaks. The highlights make the 3D shapes stand out.
The Curing Rules: Drying and Sealing
The last stage is mostly about patience.
15. Never force dry with a heat gun
It’s tempting to speed things up with a hair dryer, but heat dries the top layer too quickly while the paste underneath is still wet, and the surface can tear and crack.
16. Lay the canvas flat while curing
Don’t prop the canvas against a wall while it dries, because heavy wet paste can slowly slide and distort your arches. Leave it flat on a table in a dry, well-ventilated room for at least 24 to 48 hours.

17. Mix color into the paste with caution
You can mix acrylic paint straight into wet modeling paste. Because the paste is bright white, though, black paint gives you soft charcoal gray rather than black. For deep, saturated colors, let the white paste dry and paint over it instead.
18. Seal the final piece with a matte varnish
Modeling paste has a porous, chalky finish that attracts dust, pet hair and fingerprints. Once your art is fully dry and painted, spray on a matte acrylic varnish. It locks in the texture, helps prevent yellowing and makes the piece easy to dust.
Frequently Asked Questions
Can I use joint compound instead of modeling paste on canvas?
It’s not ideal. Joint compound is made for rigid walls and isn’t flexible, so as a stretched canvas moves, it tends to crack, shrink and flake off. A flexible acrylic modeling paste works much better on canvas.
How long does acrylic modeling paste take to dry?
It depends on how thick it is and how humid your room is. A thin layer can be dry to the touch in about two hours, while heavy impasto can take anywhere from 48 hours to a week to dry all the way through.
Can you mix oil paint with acrylic modeling paste?
Not while it’s wet. Oil paint and water-based acrylic don’t mix, so the paste won’t bind properly. Once the modeling paste is completely dry, though, you can paint over it with oils.

