
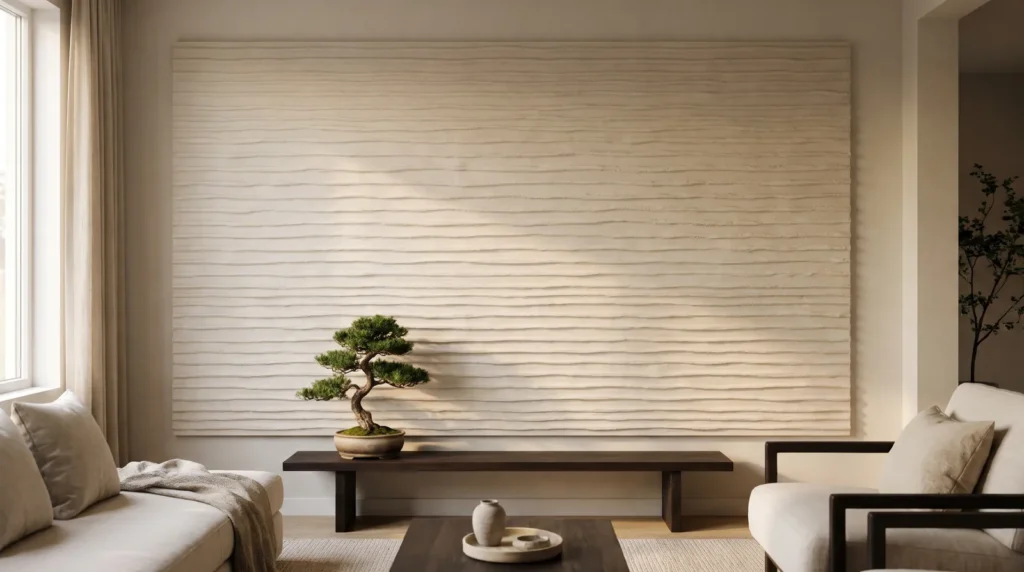
Large Japandi textured wall art can sell for well over a thousand dollars in design shops, yet many of those pieces are a sturdy canvas or panel finished with plaster or joint compound. The materials for a similar piece cost far less, often around thirty dollars. You don’t need a big budget to bring that warm, calm texture into your home. What you need is a good grasp of how the materials behave: how much water the mix holds, what the grit does, and how pressure on the trowel shapes the surface. Get those right and the finished piece softens a room, catches light in gentle shadows and holds up for years. Here is how to make one, step by step, without the cracking that ruins most first attempts.
At a Glance
- Use a rigid base. Pre-stretched canvases bend under heavy wet plaster, so brace the frame or use an MDF panel.
- Add PVA to the mix. Joint compound shrinks noticeably as it dries; a little PVA glue helps it bend instead of cracking.
- Make the texture deep enough to cast shadows. Ridges about a quarter inch deep show up well under side lighting.
Building a Rigid Frame
Most first attempts crack because of what’s underneath the plaster, not the plaster itself, so start with a firm base.
1. Build a Rigid Base
Cotton and linen canvases stretch. When you spread heavy, wet compound on one, the fabric soaks up water and the weight pulls the middle down. Then, as the compound dries and shrinks, the canvas tightens again, and that tug-of-war cracks the plaster, often within a few days.
To make minimalist plaster canvas art that stays put, stop the base from flexing. You have two good options. The first is to skip the canvas and use a 1/2-inch MDF board or a solid PVC panel, neither of which will bow under wet plaster.
If you like the look of a gallery-wrapped canvas, brace the back instead: fix wooden cross-pieces across the stretcher bars about every 12 inches. Then brush on three coats of thick acrylic gesso. It keeps the wet compound from soaking into the cotton and gives the plaster a slightly rough surface to grip.

Mixing the Plaster
The hardware store has a whole wall of white buckets, and they behave quite differently. Knowing what’s in them helps you pick the right one.
2. Mix Joint Compound With PVA
Spackle, topping compound and Venetian plaster aren’t interchangeable. Lightweight spackle dries fast but is soft and crumbles if you knock it. Venetian plaster dries rock hard but is very heavy, too heavy for a standard canvas.
All-purpose joint compound is a good middle ground. It’s mostly calcium carbonate, easy to work and stays wet long enough to shape, but on its own it isn’t very flexible.
To fix that, scoop some compound into a separate bucket and stir in about 10 percent PVA glue, mixing until it’s smooth and thick. The glue makes the dried plaster more flexible, so it can cope with small changes in humidity without cracking.

Applying the Texture
How you hold the trowel and how hard you press shape the final surface, so take it slowly.
3. Add Gentle Imperfections
Wabi-sabi celebrates natural wear and imperfection, but it isn’t the same as random mess. The best pieces have imperfections that feel deliberate, so the surface looks like something weathered by time.
Spoon a generous amount of your mix onto the center of the board. Use a stainless steel notched trowel, since plastic ones bend and leave uneven ridges, and hold it at about 45 degrees to the surface. The harder you press, the higher the ridges.
For soft, sweeping arches, keep your wrist still and move your whole arm from the shoulder. It gives a smooth, natural curve rather than a stiff, mechanical one. Ease off the pressure toward the edge of the board and let the trowel skip slightly, leaving broken, eroded-looking texture.
Curing and Color
Drying is where most pieces succeed or fail, so give it time.
4. Dry It Slowly and Keep It Matte
Don’t speed up drying with a heat gun. Fast drying hardens the surface while moisture is still trapped underneath, and when that moisture escapes it can push off chunks of plaster.
Let the piece dry at around 68°F in a room with gentle airflow for at least 48 hours.

Once it’s dry, the plaster is very porous. Ordinary acrylic house paint soaks in unevenly and looks blotchy.
Seal it first with a coat of PVA primer applied with a dense foam roller, which fills the tiny pores. Once that’s dry, add your color. Matte limewash gives the most natural finish: the lime slowly reacts with the air and hardens back into a limestone-like surface that softens the light. It’s the ultra-matte look you see in high-end neutral living rooms.

Troubleshooting Common Problems
Even when you do everything right, your home’s conditions can affect the finished piece. Here are fixes for the most common problems.
Why is my plaster cracking after two weeks?
Cracks that show up later usually mean the base is flexing or the air is very dry. Hanging the piece near a heating vent, for example, can dry out the plaster faster than the base can adjust. To repair a crack, run a thin bead of PVA glue into it with a syringe, press a little fresh compound over the gap and sand it smooth once dry.
What is the best lighting angle for textured art?
Texture shows up through shadow, so flat overhead light makes the ridges disappear. Place a directional light so it hits the surface at a low angle, roughly 15 to 30 degrees. The high points then cast long shadows into the grooves.
How do I dust the surface?
Don’t use a wet cloth, because water softens raw plaster and blurs the ridges. Use a can of compressed air, or an air compressor on a low setting, and blow the dust out of the grooves from about six inches away.
With a rigid base, a flexible mix and slow drying, you can make Japandi textured art that looks like a designer piece and lasts for years.
To avoid other common causes of cracking, see 25 DIY Plaster Art Canvas Mistakes and How to Fix Them.

