
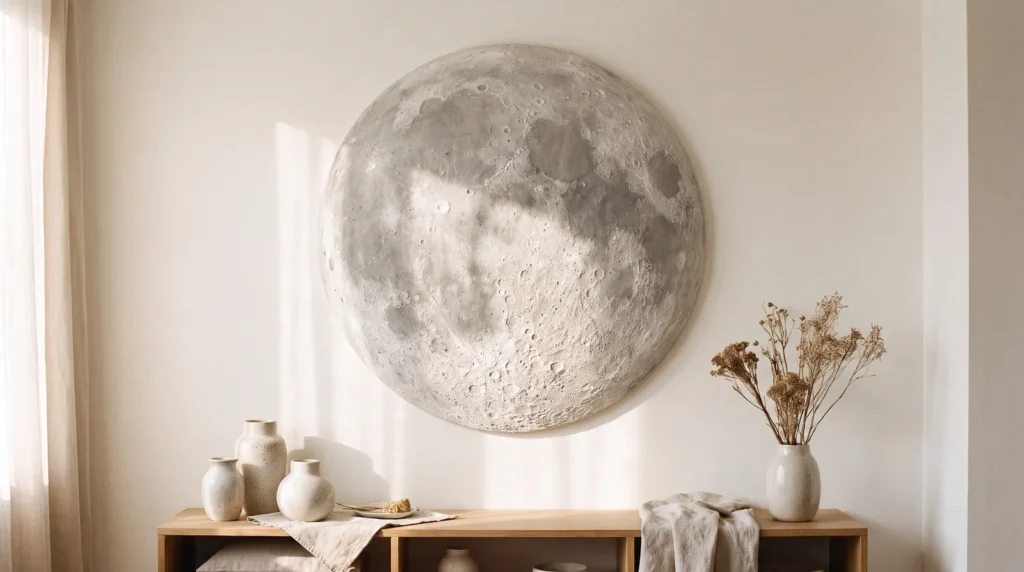
Making diy plaster moon art is a lot like baking a wild yeast sourdough loaf: you mix powder and water, leave it alone and hope it turns out well. Without knowing the hydration ratio or how the crust reacts to temperature changes, though, you just get a dense brick. Plaster behaves the same way, because it shrinks, breathes and cracks as the moisture evaporates.
A common mistake is spreading wet paste onto a cheap canvas and watching it flake off a week later. This guide helps you avoid that, so you end up with a piece that feels organic, earthy and pleasingly imperfect, with deep craters that catch the evening light.
Here’s how to build a heavy, textured moon piece that looks like it came from a coastal gallery, in 13 simple steps.
The Short Version
- Avoid a standard stretched canvas for heavy plaster. The fabric bounces like a trampoline and can crack the dried texture.
- Premixed joint compound gives you far more working time than traditional plaster.
- Building texture in thin layers prevents the deep cracks that spoil thick applications.
- A matte polyurethane seal stops chalky dust from rubbing off onto furniture and clothes.
The Raw Ingredients

It all starts with the right supplies, and choosing well at the hardware store makes the rest of the project much easier.
1. Ditch the Stretched Canvas for Rigid MDF
This is the most common mistake. When you spread wet mud on a stretched cotton canvas, the fabric absorbs the water and sags, then tightens again as it dries. That back-and-forth movement makes the dried paste crack and flake. A rigid MDF board or hard canvas panel gives you a solid base for heavy textured canvas art.
2. Pick Joint Compound Over Plaster of Paris
Many plaster of Paris tutorials tell you to mix powder and water, but there’s an easier way. Plaster of Paris sets through a chemical reaction that heats up and hardens within minutes, which leaves you rushing. Premixed all-purpose joint compound dries slowly by evaporation instead, giving you hours to play with the texture, fix mistakes and enjoy your coffee while you work.
3. Choose a Flexible Putty Knife
Plastic putty knives drag and skip over the surface, so they’re not much help here. A 4-inch carbon steel taping knife is a better choice: its blade flexes slightly, which lets you glide over the mud and make the smooth, sweeping plains of the moon’s surface easily.
Mixing and Prepping the Base

A well-prepared board helps your artwork cope with changing seasons and humidity, so it’s worth doing properly.
4. Prime the Board with a Moisture Barrier
MDF doesn’t like water: wet joint compound on raw board makes the wood swell. Roll on a quick coat of PVA primer or plain white acrylic paint first to seal the surface, so the board doesn’t soak the moisture out of your mud too fast.
5. Whip Your Compound Like Buttercream
Fresh joint compound is quite dense. Scoop a few cups into a bucket, add a small splash of water and stir with a paint stick until it feels like soft buttercream. This slight thinning makes it much easier to spread and helps it stick to the primed board.
6. Tape Off a Perfect Lunar Border
For a crescent or a crisp circular edge, don’t freehand it. Lightly trace around a large mixing bowl or a hula hoop with a pencil, then lay flexible automotive detailing tape along the line, since ordinary painter’s tape wrinkles on curves. Spread your mud, peel the tape while it’s still wet, and you’ll have a clean, sharp edge.
Sculpting the Lunar Surface

This is the fun part, where you build the craters, ridges and valleys that will cast shadows on your wall.
7. The Sea Sponge Crater Technique
Kitchen sponges leave a repeating, artificial pattern, so use a natural sea sponge instead. Dampen it, wring it out completely, dab it into the wet mud, then press it onto the board and lift straight up. Its natural holes pull the mud into rough peaks that look just like lunar craters. If you love this organic look, see my guide to 21 Wabi Sabi Wall Decor DIY Ideas for a Calm, Natural Home.
8. Build Texture in Micro-Layers
Thick mud tends to crack. Pile an inch of joint compound onto the board for a mountain and it will split as the water evaporates. The secret to deep texture is patience: apply a thin base layer, let it dry overnight, then add a second layer for the deeper craters. Building up in thin layers makes the piece much stronger.
9. The Crumpled Foil Stamping Method
For sharp, rocky ridges along the edge of your moon, crumple a sheet of aluminum foil into a tight ball, press it firmly into the half-dry mud and roll it slightly. The foil’s sharp creases make jagged lines that contrast nicely with the soft sponge craters.
Curing and Coloring the Moon Phase

This stage is about patience. Letting the piece dry properly and adding a subtle wash of color gives it a polished, gallery look.
10. Slow Down the Drying Time
Keep wet artwork out of direct sunlight and away from space heaters. Drying too fast creates surface tension, and surface tension leads to spiderweb cracks. Let the piece dry in a cool, shaded room for at least 48 hours; it will turn from dark grey to a bright, chalky white once fully cured.
11. Dry Brushing for Realistic Shadows
A pure white moon can look flat, so add a little depth. Put a tiny drop each of raw umber and titanium white acrylic on a paper plate, dip a dry, stiff brush in, and wipe almost all of it off on a paper towel. Brush lightly over the texture so the paint only catches the raised edges. It gives the effect of deep shadows and glowing peaks.
12. Seal the Surface with Matte Polyurethane
Dried joint compound is basically chalk, so it can leave white dust on your clothes if you brush against it. Take it outside and spray it with two coats of clear matte polyurethane to bind the dust, protect the paint and guard against humidity. Make sure the finish is matte, because gloss spoils the natural look.
A Finishing Touch
One more idea takes this project a step further, so the piece changes as the light in your room shifts from morning to evening.
13. Backlight with Warm White LEDs
If you built your moon on a round wooden panel, you can add a soft eclipse glow. Stick a battery-powered LED strip around the back of the panel, about an inch in from the edge. When it’s on the wall and the lights are switched on, a warm halo spreads out from behind the moon and makes the room feel cozy.
Frequently Asked Questions
Can I use regular spackle for textured canvas art?
You can use lightweight spackle, but it behaves differently than joint compound. Spackle is very airy and holds its shape well, making it great for thick, fluffy textures. However, it dries very fast and can be difficult to smooth out for the flatter plains of the moon. Joint compound is much better for large-scale pieces where you need time to blend the edges.
How long does plaster take to dry on canvas?
Depending on the humidity in your home and the thickness of your application, joint compound takes between 24 and 72 hours to fully cure. You’ll know it’s dry when the surface is completely uniform in color. If there are dark grey spots, water is still trapped inside. Don’t paint or seal the piece until it’s bone dry.
Does plaster make the canvas too heavy to hang?
Yes. Layers of joint compound on a rigid MDF board make the finished piece fairly heavy, and a single nail in drywall won’t hold it. Use heavy-duty drywall anchors or screw into a wall stud. Weigh the dry piece on a bathroom scale and choose hanging hardware rated for at least ten pounds more than that.
Final Thoughts
Getting your hands messy and making something beautiful from scratch is a lovely way to spend a weekend. Take your time with the layers and the drying, and your moon will be one of the most personal pieces in your home.

