
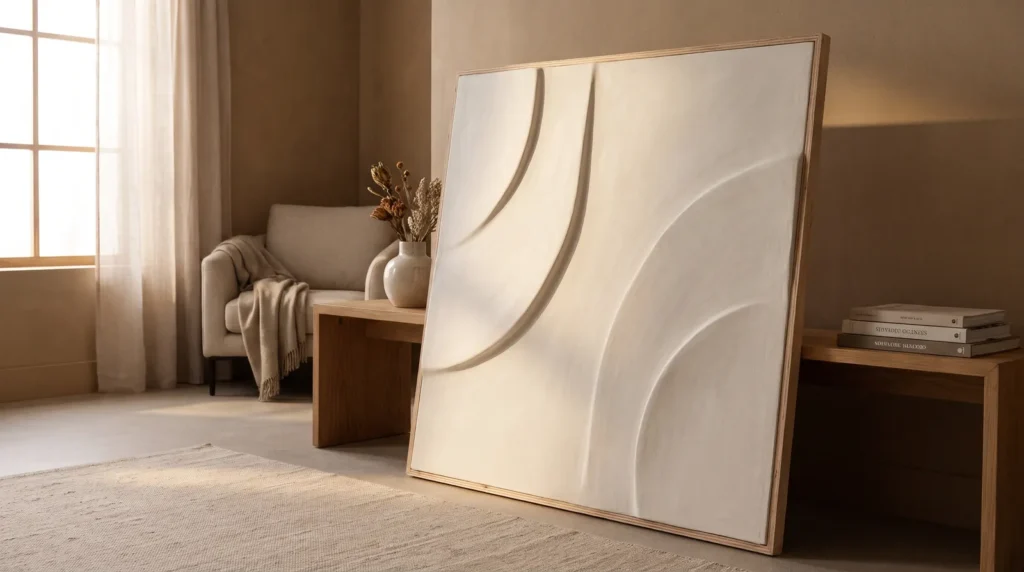
A large, textured statement piece can transform a living room, but buying one can easily cost $1,200 or more. Making your own plaster art on plywood is one of the best ways to get that modern organic look on a budget.
Plywood also solves the most common problem with this trend. Many tutorials use a fabric canvas, and a few weeks later the canvas sags under the weight, the fabric stretches and the texture cracks. A wood panel stays rigid, so the plaster has a solid surface to hold on to.
These 25 lessons take you from choosing the wood to hanging the finished piece safely.
You’ll learn how to prepare the wood so it doesn’t stain or warp, which compound to use, a few simple texture techniques, and how to dry, seal and hang a heavy panel.
Let’s start with the wood.
Key Takeaways
- Raw wood soaks up moisture from wet plaster, so seal the plywood with a good acrylic gesso or primer to prevent warping and cracking.
- Joint compound shrinks as it dries. Mixing in acrylic modeling paste adds flexibility and helps prevent deep cracks.
- Heavy textured art needs proper hanging hardware. A heavy-duty aluminum French cleat is the safest choice for large wood panels.
- Don’t speed up drying with heat. Plaster needs to dry slowly and evenly to stay strong.
Choosing the Wood
Plaster is heavy, so it needs a rigid surface to grip. The panel you choose makes a big difference to how long the piece lasts.
1. Skip the Fabric Canvas
Stretched canvas is made for thin layers of paint, and it behaves a bit like a trampoline. Put five pounds of wet plaster on it and it bows inward; once the plaster hardens, any small movement in the fabric can crack it right off.
2. Choose Baltic Birch
Not all plywood is the same. Construction-grade pine plywood has knots, sap and rough patches, while Baltic birch has a tight, smooth grain that takes primer beautifully, which is why so many artists use it.
3. Choose the Right Thickness
Thin wood can warp when it gets damp. For anything larger than 24 by 36 inches, skip 1/4-inch plywood and use 1/2-inch or 3/4-inch panels. They’re heavier, but they stay rigid under thick texture.

4. Have the Store Cut It for You
Not comfortable with power tools? You don’t need them. Most large home improvement stores will cut wood panels to your measurements for free or a small fee, so just bring your dimensions and let them use their panel saw.
Prepping the Wood
This is the step most people skip. Wet plaster shouldn’t go straight onto raw wood, and a little preparation prevents stains, warping and peeling.
5. Watch Out for Tannin Bleed
Wood contains natural oils and tannins. Spread water-based plaster on raw plywood and those tannins can seep up with the moisture, leaving yellow-brown stains in your white plaster.
6. Sand the Edges Smooth
Run a 120-grit sanding block along the cut edges to remove splinters. Clean, smooth sides look deliberate, especially if you plan to leave the piece unframed.
7. Seal With Acrylic Gesso
Gesso is the thick white primer artists use, and it creates a barrier between the wood and your plaster. Brush two generous coats onto the front of the panel, letting each one dry completely.
8. Prime the Back Too
If you seal and plaster only the front, the board can bow toward the wet side as it dries. A quick coat of primer on the back balances the two sides and keeps the board flat.
9. Give the Surface Some Tooth
Once the gesso is dry, scuff it lightly with 220-grit sandpaper. Plaster grips a slightly rough surface (often called a tooth) much better than a smooth one. Wipe off the dust with a damp microfiber cloth.

Choosing Your Plaster
“Plaster” can mean several different products, and the one you choose affects both the look and how long your 3D plaster wall decor lasts.
10. The Problem With Joint Compound
Drywall joint compound is cheap and easy to find, but it’s brittle. It’s made to fill small gaps in drywall, not to be built up an inch thick, so if you use it, keep the layers thin.
11. Why Modeling Paste Is Better
Acrylic modeling paste is a favorite of many artists. Its acrylic binder lets it dry hard while keeping a little flexibility, so it’s much less likely to crack than joint compound. It costs more, but it makes a clean, high-end finish far easier to achieve.
12. Mix Compound and Paste
For a balance of cost and strength, mix them. Two parts joint compound to one part acrylic modeling paste gives you the bulk and low price of the compound with much of the crack resistance of the paste.
13. Avoid Plaster of Paris
Plaster of Paris sets in minutes and dries rock hard and heavy. It’s made for casting molds, not spreading over a large panel, and it’ll start setting before you’ve finished your texture.
14. Try Venetian Plaster for a Subtle Finish
If you don’t want deep, chunky 3D ridges, look into Venetian plaster. It contains real marble dust. When applied with a trowel, it creates a smooth, suede-like finish that catches the light beautifully.
Texture Techniques
When you’re making joint compound art on wood panels, a little restraint goes a long way. Simple, confident marks usually look more expensive than busy ones.
15. Use a Good Trowel
Tiny plastic putty knives make it hard to get smooth, wide strokes. A stainless steel Venetian trowel has a large, flat blade that lets you sweep the compound across the board in long, confident arcs.

16. The Wabi-Sabi Sweep
For a relaxed, imperfect look, spread the mix in broad, overlapping half-circles and resist the urge to keep smoothing it. The raw edges where the trowel lifts off are part of the charm.
17. The Geometric Arch
For a neater, fluted look, pick up an inexpensive metal icing comb from the baking aisle. Spread a thick, even layer of plaster and drag the comb through it in one sweeping arch to create even ridges.
18. Keep The Edges Clean
Messy edges can make a nice piece look homemade. Keep a damp sponge nearby and wipe the four outer edges of the panel clean before the plaster sets.
19. Limit Your Thickness
Keep each layer under about half an inch. If you want very deep texture, build it up in several thin layers and let each one dry completely before adding the next.
Curing and Finishing
This stage mostly takes patience.
20. Let It Cure Naturally
Keep heaters, hair dryers and direct sunlight away from wet plaster. Heat dries the surface faster than the layers underneath, so the top shrinks while the bottom is still wet, and that leads to deep cracks. Let it air dry in a cool, shaded room for at least 48 hours.
21. Knock Down The Peaks
Once it’s completely dry, the texture may have a few sharp peaks. Rub the highest points gently with fine-grit sandpaper to soften them and give the piece a more natural, weathered feel.
22. Seal Before You Paint
Dried plaster is extremely porous, so acrylic paint applied directly onto it soaks in unevenly and can look chalky and patchy. Spray the dried piece with a clear matte acrylic sealer first, then paint over it.
How to Hang Heavy Art
A 36 by 48 inch plywood panel covered in plaster can weigh over 30 pounds, so a single nail won’t do.
23. Use a French Cleat
A French cleat is the most secure way to hang a heavy wood panel. It’s a two-piece interlocking bracket: one half screws into the wall studs and the other into the back of the art, and they slide together to hold the panel flat against the wall.

24. Find the Studs
For a large plaster piece, don’t rely on drywall anchors alone. Use a stud finder and screw the wall half of the cleat into solid wood studs.
25. Add Bumpers
Stick two rubber cabinet bumpers on the bottom back corners of the panel. The cleat holds the top slightly away from the wall, and the bumpers keep the bottom at the same distance, so the piece hangs straight and casts even shadows.
Frequently Asked Questions
Can I use drywall joint compound for textured art?
Yes, with a little care. Joint compound cracks if it’s applied too thickly because it isn’t very flexible. Mix it with acrylic modeling paste, or apply it in thin layers over a well-primed wood panel.
Do I need to paint plaster art, or can I leave it raw?
It’s best not to leave it completely raw. Unsealed plaster soaks up dust, humidity and oils from the air. Even if you love the natural white, a clear matte acrylic spray sealer will protect it.
Is MDF better than plywood for plaster art?
Plywood is the safer choice. MDF swells if water soaks into it, so if you do use MDF, seal it well on all sides with primer before adding plaster. Good sanded plywood or Baltic birch is more forgiving.
Final Thoughts
With a rigid plywood base, a well-sealed surface and a little patience while it dries, you can make plaster art that won’t sag or crack and looks great for years. For ideas on lighting and styling your finished panel, see my guide to 5 Plaster Wall Art Interior Design Tips for a Calm Home.

